
5
specific to the pasta. After countdown ends it will go back into default state.
3.“Stew”: First place the ingredients into the Inner pot (5) then close the lid (4) and turn the pressure limiting valve (2) into Closed position.
The device starts work after 5 seconds. After finishing the countdown the device goes into Keep warm mode.
4.“Meat”: First place the ingredients into the Inner pot (5) then close the lid (4) and turn the pressure limiting valve (2) into Closed position.
The device starts work after 5 seconds. After finishing the countdown the device goes into Keep warm mode.
6. “FRY”: Must open the Lid (4) to cook Default temperature is 175-178°C。 Countdown starts after “FRY" button is pressed and back to
the original state after finishing work.
7.“RICE”: First place the ingredients into the Inner pot (5) then close the lid (4) and turn the pressure limiting valve (2) into Closed position.
For each cup of rice please add around 1 cup of water. The device starts work after 5 seconds. . After finishing the countdown the
device goes into Keep warm mode.
8.“Porridge” : First place the ingredients into the Inner pot (5) then close the lid (4) and turn the pressure limiting valve (2) into Closed
position. The device starts work after 5 seconds. . After finishing the countdown the device goes into Keep warm mode.
9.“Waterless Bake”: Default temperature is 120-130°C。Countdown starts after "Waterless bake" button is pressed and keep warm starts
after finishing work.
10. “Keep pressure”: This function keeps the device pressurized without cooking. It heats up only to keep the pressure. Default time is 2
minutes. It then goes into Keep warm mode. Not intended for heating up food. If you think that the food is hard and could use more
of pressure treatment then use this function.
11. Function Buttons- Additional more specific programs Press the button to choose one of the 6 sub-programs listed below:
11.A “Fish”: First place the ingredients into the Inner pot (5) then close the lid (4) and turn the pressure limiting valve (2) into Closed
position. The device starts work after 5 seconds. After finishing the countdown the device goes into Keep warm mode.
11.B “Bean”: First place the ingredients into the Inner pot (5) then close the lid (4) and turn the pressure limiting valve (2) into Closed
position. The device starts work after 5 seconds. After finishing the countdown the device goes into Keep warm mode.
11.C “Chicken”: First place the ingredients into the Inner pot (5) then close the lid (4) and turn the pressure limiting valve (2) into Closed
position. The device starts work after 5 seconds. After finishing the countdown the device goes into Keep warm mode.
11.D “CAKE”: Default temperature is 125-135C. ”: First place the ingredients into the Inner pot (5) then close the lid (4) and turn the
pressure limiting valve (2) into Closed position. The device starts work after 5 seconds. . After finishing the countdown the device
goes into Keep warm mode.
11.E “Vegetable”: First place the ingredients into the Inner pot (5) then close the lid (4) and turn the pressure limiting valve (2) into Closed
position. The device starts work after 5 seconds. After finishing the countdown the device goes into Keep warm mode.
11.F “Seafood”: First place the ingredients into the Inner pot (5) then close the lid (4) and turn the pressure limiting valve (2) into Closed
position. The device starts work after 5 seconds. . After finishing the countdown the device goes into Keep warm mode.
12. “Taste”: Each program has 3 preset times. You can change the time by pressing the “Taste” button and choosing one of the three
options or you can change the time by pressing the “+” or “--” buttons.
Working Times for functions:
All programs can have their times adjusted from 1 minute to 99 minutes.
Corn:
Default time: 00:25 Minutes | Taste time Options: 20 ,25, 32 minutes
Soup:
Default time: 00:15 Minutes | Taste time Options: 10 ,15, 18 minutes
Stew:
Default time: 00:40 Minutes | Taste time Options: 35 ,40, 60 minutes
Meat:
Default time: 00:20 Minutes | Taste time Options: 12 ,20, 28 minutes
Fry:
Default time: 00:30 Minutes | Taste time Options: 25 ,30, 35 minutes
Rice:
Default time: 00:25 Minutes | Taste time Options: 20 ,25, 30 minutes
Porridge:
Default time: 00:15 Minutes | Taste time Options: 10 ,15, 20 minutes
Waterless Bake:
Default time: 00:28 Minutes | Taste time Options: 26 ,28, 32 minutes
Fish:
Default time: 00:10 Minutes | Taste time Options: 8 ,10, 16 minutes
Bean:
Default time: 00:30 Minutes | Taste time Options: 25 ,30, 40 minutes
Chicken:
Default time: 00:15 Minutes | Taste time Options: 12 ,15, 20 minutes
Cake:
Default time: 00:32 Minutes | Taste time Options: 25 ,32, 40 minutes
Vegetable:
Default time: 00:18 Minutes | Taste time Options: 13 ,18, 25 minutes
Sea Food:
Default time: 00:13 Minutes | Taste time Options: 11 ,13, 17 minutes
Reservation:
You can set the delay of the program from 10 minutes till 24 hours the step is 10 minutes per press of the + / - buttons.
Cleaning:
1. Unplug the power cord from the wall socket
2. Unplug the power cord from the device
3. With a slightly damp rag wipe the outside of the device
4. Open the lid.
5. With a damp rag clean the underside of the lid.
6. Remove the inner pot.
7. Clean the inner pot with clean water with cleaning detergent.
8. With a slightly damp cloth you can clean the inner part of the middle layer.



Deltag i samtalen om dette produkt
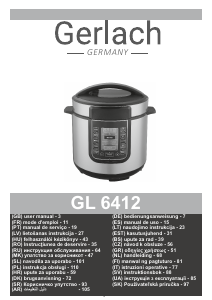
Her kan du dele, hvad du synes om Gerlach GL 6412 Trykkoger. Hvis du har et spørgsmål, skal du først læse brugsanvisningen omhyggeligt. Anmodning om en brugsanvisning kan ske ved at bruge vores kontaktformular.
svar | Dette var nyttigt (1) (Oversat af Google)