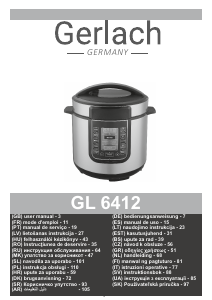
Brugsanvisning Gerlach GL 6412 Trykkoger

Har du brug for en brugsanvisning til din Gerlach GL 6412 Trykkoger? Nedenfor kan du se og downloade PDF-brugsanvisningen gratis på Dansk. Dette produkt har i øjeblikket 2 ofte stillede spørgsmål, 1 kommentar og har 1 stemme med en gennemsnitlig produktvurdering på 0/100. Hvis dette ikke er den brugsanvisning, du ønsker, bedes du kontakte os.

Er dit produkt defekt, uden at brugsanvisningen har en løsning på problemet? Tag til en Repair Café, og få gratis reparation.

Brugsanvisning

Loading…

4
7. Plug in the Power cord into the hole positioned in the Plastic base (8) of the device.
It will stay in that position until pressure is reached inside the inner pot during work.
6. Check the pressure limiting valve (2) and the float valve (3). The valve should be in the down position.
5. Close the lid (2). Hold the handle (1) and turn it Counter-Clockwise to the “LOCKED” position. (A clamping sound can be heard)
4.Closing the Lid: Make sure the Rubber Seal Ring is fitted properly onto the metal ring inside the lid.
3. Be certain the inner receptacle, where the Electronic Heater is located, is clean and dry before inserting the Inner Pot (5) into the
pressure cooker and adjust the pot left and right to ensure optimal contact between the Inner Pot and the Heating Element (6).
2. Remove the inner pot (5) and add desired ingredients. The amount of water and food should not exceed 2/3 of the height of the inner
Pot (5). For food that will expand in water, the level should not exceed 1/2 of the Inner Pot (5).
1. Opening the lid: Hold the handle (1) firmly, turn the lid (4) clockwise until it loosens and lift vertically. the lid (2).
Preparing the Device:
15. Display
12. Taste 13. + / - 14. Warm / Cancel
F. Seafood
E. Vegetable
D. Cake
C. Chicken
B. Bean
A. Fish
11. Function:
10. Keep pressure
7. Rice 8. Porridge 9. Waterless Bake
4. Meat 5. Reservation 6. Fry
1. Corn 2. Soup 3. Stew
Control Panel (2B)
9. Body 10. Carrying handles 11. Middle layer
5. Inner Pot 6. Heating Element 7. Control Panel 8. Plastic base
1. Handle 2. Pressure limiting Valve 3. Float Valve 4. Lid
DEVICE (1A)
DESCRIPTION OF THE APPLIANCE:
17. !!WARNING!! The device emits hot steam under pressure. There is a high chance of
burning. Please make sure to use protective gloves or wooden utensils when handling
the device and when opening the device.
You can press “Cancel” to stop the program at any time.
2. After choosing the desired program the default time will be shown on display and it will start flashing. You can change that by
pressing the – and + (14) buttons.
1. Press the desired function button (1-11).
Device Operation:
9. The device will emit a Beep sound tone, all lights will turn on for a second and then turn off. The device will then go into standby mode
and show “0000” on the display (15).
8. Plug the power cord into the mains.
00:30, 01:00, 01:30… etc.
Reservation: The button can be used with combination with any of the menu programs. It is designed to delay the start of the chosen
program the starting time is 30 minutes. The program will start after 30 minutes has passed. The maximum time is 24 hours. It
advances in 30 minute steps.
Please keep the “Pressure limiting valve” in the “Open” position until the “Float valve” drops down.
To open the lid first turn the “Pressure limiting valve” (2) to the right. !!! CAUTION !!! this will start releasing pressure and steam. If not
handled with care you can burn yourself !!!
The lid is locked by the pressure lock.
Press the Cancel / Keep warm (13) button to return the device will enter Standby mode.
After the device finishes work on the program it will give off a sound signal. Then it will turn on the “Keep Warm” program.
Finishing cooking:
Cancel / Stop program / Stop cooking: During any of the programs you can press the “Keep warm / Cancel” (13) button to abort any
program in progress.
Keep warm: In standby mode press the “Keep warm / Cancel” ( 13) button. The function will start and the display (15) will show “bb”. The
keep warm temperature is 65C-75C. Press the button again to finish the function and revert to standby. This function will also
activate automatically after finishing each of the programs.
You will hear a *click* and then you will be able to open the lid.
2.“Soup”: First put water into the Inner pot (5) then close the lid (4) and turn the pressure limiting valve (2) into Closed position. Let the
water boil. The device will indicate when the water is boiling by a sound tone. Open the lid. Add the pasta and boil for a time
1.“Corn”: First place the ingredients into the Inner pot (5) then close the lid (4) and turn the pressure limiting valve (2) into Closed
position. The device starts work after 5 seconds. After finishing the countdown the device goes into Keep warm mode.
MENU BUTTONS:
Download brugsanvisningen på Dansk (PDF, 3.3 MB)
(Tag hensyn til miljøet, og udskriv kun denne brugsanvisning, hvis det er virkelig nødvendigt)

Loading…

Bedømmelse

Fortæl os, hvad du synes om Gerlach GL 6412 Trykkoger ved at lave en produktbedømmelse. Vil du dele dine oplevelser med dette produkt eller stille et spørgsmål? Skriv en kommentar nederst på siden.
Er du tilfreds med Gerlach GL 6412 Trykkoger?
Ja Ingen
0%
100%
1 stemme

Deltag i samtalen om dette produkt

Her kan du dele, hvad du synes om Gerlach GL 6412 Trykkoger. Hvis du har et spørgsmål, skal du først læse brugsanvisningen omhyggeligt. Anmodning om en brugsanvisning kan ske ved at bruge vores kontaktformular.

Άιντα Κωνσταντίνομανωλακη 19-01-2023
Jeg vil have, at min hætte er knækket

svar | Dette var nyttigt (1) (Oversat af Google)

Mere om denne brugsanvisning

Vi forstår, at det er rart at have en papirbrugsanvisning til din Gerlach GL 6412 Trykkoger. Du kan altid downloade brugsanvisningen fra vores hjemmeside og selv printe den. Hvis du gerne vil have en original brugsanvisning, anbefaler vi, at du kontakter Gerlach. De kan muligvis levere en original brugsanvisning. Leder du efter brugsanvisningen til din Gerlach GL 6412 Trykkoger på et andet sprog? Vælg dit foretrukne sprog på vores hjemmeside, og søg efter modelnummeret for at se, om vi har det tilgængeligt.

Specifikationer

Mærke Gerlach
Model GL 6412
Kategori Trykkogere
Filtype PDF
Filstørrelse 3.3 MB

Alle brugsanvisninger til Gerlach Trykkogere
Flere brugsanvisninger til Trykkogere

Ofte stillede spørgsmål om Gerlach GL 6412 Trykkoger

Vores support-team søger efter nyttige produktoplysninger og svar på ofte stillede spørgsmål. Hvis du finder urigtigheder i vores ofte stillede spørgsmål, må du meget gerne lade os det vide ved at bruge vores kontaktformular.

Hvor tit skal pakningen i min trykkoger udskiftes? Verificeret

Ideelt set kontrolleres pakningen i trykkogeren mindst én gang om året og udskiftes om nødvendigt. Pakningens levetid er afhængigt af mærke, model og brugsforhold.

Dette var nyttigt (848) Læs mere

Er en riskoger det samme som en trykkoger? Verificeret

Selvom disse to produkter er meget ens, er de fundamentalt forskellige. Den største forskel er, at en trykkoger altid kan lukkes lufttæt, og en riskoger ikke.

Dette var nyttigt (287) Læs mere
Brugsanvisning Gerlach GL 6412 Trykkoger

Relaterede produkter

Relaterede kategorier

×
Download