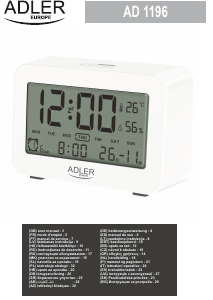
Brugsanvisning Adler AD 1195 Radio-vækkeure
Har du brug for en brugsanvisning til din Adler AD 1195 Radio-vækkeure? Nedenfor kan du se og downloade PDF-brugsanvisningen gratis på Dansk. Dette produkt har i øjeblikket 3 ofte stillede spørgsmål, 0 kommentarer og har 0 stemmer. Hvis dette ikke er den brugsanvisning, du ønsker, bedes du kontakte os.
Er dit produkt defekt, uden at brugsanvisningen har en løsning på problemet? Tag til en Repair Café, og få gratis reparation.
Brugsanvisning
Loading…


Loading…
Bedømmelse
Fortæl os, hvad du synes om Adler AD 1195 Radio-vækkeure ved at lave en produktbedømmelse. Vil du dele dine oplevelser med dette produkt eller stille et spørgsmål? Skriv en kommentar nederst på siden.Mere om denne brugsanvisning
Vi forstår, at det er rart at have en papirbrugsanvisning til din Adler AD 1195 Radio-vækkeure. Du kan altid downloade brugsanvisningen fra vores hjemmeside og selv printe den. Hvis du gerne vil have en original brugsanvisning, anbefaler vi, at du kontakter Adler. De kan muligvis levere en original brugsanvisning. Leder du efter brugsanvisningen til din Adler AD 1195 Radio-vækkeure på et andet sprog? Vælg dit foretrukne sprog på vores hjemmeside, og søg efter modelnummeret for at se, om vi har det tilgængeligt.
Specifikationer
| Mærke | Adler |
| Model | AD 1195 |
| Kategori | Radio-vækkeure |
| Filtype | |
| Filstørrelse | 3.89 MB |
Alle brugsanvisninger til Adler Radio-vækkeure
Flere brugsanvisninger til Radio-vækkeure
Ofte stillede spørgsmål om Adler AD 1195 Radio-vækkeure
Vores support-team søger efter nyttige produktoplysninger og svar på ofte stillede spørgsmål. Hvis du finder urigtigheder i vores ofte stillede spørgsmål, må du meget gerne lade os det vide ved at bruge vores kontaktformular.
Hvad står AM og PM for? Verificeret
AM står for Ante Meridiem og indikerer, at tiden er før middagstid. PM står for Post Meridiem og indikerer, at tiden er forbi middag.
Dette var nyttigt (291) Læs mereHvad er GMT? Verificeret
GMT står for Greenwich Mean Time (undertiden kaldet UTC, står for Coordinated Universal Time). Det er tiden for længdegraden 0, der passerer gennem Greenwich nær London.
Dette var nyttigt (166) Læs mereHvad er forskellen mellem FM og AM? Verificeret
FM og AM er begge former for modulering, der bruges til at transmittere et signal. FM står for Frequency Modulation og AM står for Amplitude Modulation. AM er den ældste form for modulering. Den største forskel er, at FM-signalet er meget stærkere end AM-signalet.
Dette var nyttigt (165) Læs mere


Deltag i samtalen om dette produkt
Her kan du dele, hvad du synes om Adler AD 1195 Radio-vækkeure. Hvis du har et spørgsmål, skal du først læse brugsanvisningen omhyggeligt. Anmodning om en brugsanvisning kan ske ved at bruge vores kontaktformular.