
ENGLISH
Introduction
Congratulations on your purchase and welcome to Philips! To fully benet from the
support that Philips offers, register your product at www.philips.com/welcome.
Important
Read this user manual carefully before you use the appliance and save it for future
reference.
Danger
- Never immerse the iron in water.
Warning
- Check if the voltage indicated on the appliance corresponds to the local mains
voltage before you connect the appliance.
- Do not use the appliance if the plug, the mains cord or the appliance itself shows
visible damage, or if the appliance has been dropped or leaks.
- If the mains cord is damaged, you must have it replaced by Philips, a service
centre authorised by Philips or similarly qualied persons in order to avoid a
hazard.
- Never leave the appliance unattended when it is connected to the mains.
- This appliance is not intended for use by persons (including children) with
reduced physical, sensory or mental capabilities, or lack of experience and
knowledge, unless they have been given supervision or instruction concerning
use of the appliance by a person responsible for their safety.
- Children should be supervised to ensure that they do not play with the
appliance.
- Do not let the mains cord come into contact with the hot soleplate of the iron.
Caution
- Only connect the appliance to an earthed wall socket.
- Check the mains cord regularly for possible damage.
- The soleplate of the iron can become extremely hot and may cause burns if
touched.
- When you have nished ironing, when you clean the appliance, when you ll or
empty the water tank and also when you leave the iron even for a short while:
set the steam control to position 0, put the iron on its heel and remove the
mains plug from the wall socket.
- Always place and use the iron on a stable, level and horizontal surface.
- Do not put perfume, vinegar, starch, descaling agents, ironing aids or other
chemicals in the water tank.
- This appliance is intended for household use only.
Electromagnetic elds (EMF)
This Philips appliance complies with all standards regarding electromagnetic elds
(EMF). If handled properly and according to the instructions in this user manual, the
appliance is safe to use based on scientic evidence available today.
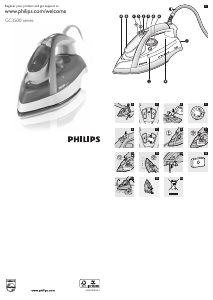
General description (Fig. 1)
A Spray nozzle
B Filling opening with cap
C Steam boost button ( 9)
D Spray button ( 8)
E Steam control
F Amber temperature light (specic types only: with red auto-off indication)
G Calc-Clean button
H Temperature dial
I Mains cord
J Heel
K Anti-Calc tablet (specic types only)
L Water tank
Not shown: lling cup
Before first use
1 Remove any sticker, protective foil or plastic from the soleplate (Fig. 2).
Preparing for use
Filling the water tank
Do not put perfume, vinegar, starch, descaling agents, ironing aids or other
chemicals in the water tank.
1 Make sure the appliance is unplugged.
2 Set the steam control to position 0 (= no steam) (Fig. 3).
3 Openthecapofthellingopening.
4 Tilttheironbackwardsandusethellingcuptollthewatertankwithtap
water up to the maximum level. (Fig. 4)
Do not ll the water tank beyond the MAX indication.
5 Closethecapofthellingopening(‘click’).
Setting the temperature
1 Put the iron on its heel.
2 To set the required ironing temperature, turn the temperature dial to the
appropriate position (Fig. 5).
Check the laundry care label for the required ironing temperature:
- 1 for synthetic fabrics (e.g. acrylic, nylon, polyamide, polyester)
- 1 for silk
- 2 for wool
- 3 for cotton and linen
If you do not know what kind or kinds of fabric an article is made of, determine the
right ironing temperature by ironing a part that is not visible when you wear or use
the article.
Silk, woollen and synthetic materials: iron the reverse side of the fabric to prevent
shiny patches. To prevent stains, do not use the spray function.
Start ironing the articles that require the lowest ironing temperature, such as those
made of synthetic bres.
3 Put the mains plug in an earthed wall socket.
, The amber temperature light goes on (Fig. 6).
4 When the temperature light goes out, wait a while before you start ironing.
The temperature light goes on from time to time during ironing.
Using the appliance
Note: The iron may give off some smoke when you use it for the rst time. This stops after
a short while.
Steam ironing
1 Make sure that there is enough water in the water tank.
2 Settherecommendedironingtemperature(seechapter‘Preparingforuse’,
section‘Settingthetemperature’).
3 Set the appropriate steam setting. Make sure that the steam setting is suitable
for the set ironing temperature: (Fig. 7)
- 1 - 2 for moderate steam (temperature settings 2 to 3)
- 3 - 4 for maximum steam (temperature settings 3 to MAX)
Note: The iron starts to produce steam as soon as it has reached the set temperature.
Note: If the selected ironing temperature is too low (MIN to 2), water may drip from
the soleplate (see chapter ‘Features’, section ‘Drip stop’).
Ironing without steam
1 Set the steam control to position 0 (= no steam) (Fig. 3).
2 Settherecommendedironingtemperature(seechapter‘Preparingforuse’,
section‘Settingthetemperature’).
Features
Spray function
You can use the spray function at any temperature to moisten the article to be
ironed. This helps remove stubborn creases.
1 Make sure that there is enough water in the water tank.
2 Press the spray button several times to moisten the article to be
ironed (Fig. 8).
Steam boost
A powerful steam boost helps to remove very stubborn creases.
The steam boost function can only be used at temperature settings between 2 and
MAX.
1 Press and release the steam boost button (Fig. 9).
Concentrated steam boost from the special Steam Tip (specic
types only)
The concentrated steam boost from the long vents in the Steam Tip enhances the
distribution of steam into every part of your garment. The concentrated steam boost
function can only be used at temperature settings between 2 and MAX.
1 Press and release the steam boost button (Fig. 10).
Vertical steam boost
You can also use the steam boost function when you hold the iron in vertical position.
This is useful for removing creases from hanging clothes, curtains etc.
1 Hold the iron in vertical position and press and release the steam boost
button (Fig. 11).
Never direct the steam at people.




Deltag i samtalen om dette produkt
Her kan du dele, hvad du synes om Philips GC3593 Strygejern. Hvis du har et spørgsmål, skal du først læse brugsanvisningen omhyggeligt. Anmodning om en brugsanvisning kan ske ved at bruge vores kontaktformular.