
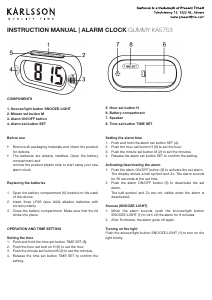
Order of Settings:
YEAR > MONTH > DATE > 12/24 HOUR FORMAT > HOUR
> MINUTE > ALARM 1 ON/OFF > ALARM HOUR > ALARM
MINUTE > ALARM 2 ON/OFF > ALARM 2 HOUR > ALARM
2 MINUTE > ALARM 3 ON/OFF > ALARM 3 HOUR >
ALARM 3 MINUTE > SOUND CONTROL (--:SD)
Setting Instructions:
Activate Setting Mode
Pr
ess and hold the SET button for 2 seconds.
Time and Date Settings
When the year ashes, use the UP/DOWN buttons to select
the correct year. Press the SET button; when the month
ashes, use the UP/DOWN buttons to select the correct
month. Press the SET button; when the date ashes, use
the UP/DOWN buttons to select the correct date. Press
the SET button; when “12H” ashes, use the UP/DOWN
buttons to select between 12-hour and 24-hour formats.
Press the SET button; when the hour ashes, use the
UP/DOWN buttons to select the correct hour. Press the
SET button; when the minute ashes, use the UP/DOWN
buttons to select the correct minute.
Alarm Settings
Press the SET button; when the screen displays “--: AL”
and ashes, use the UP/DOWN buttons to toggle the alarm
ON/OFF (“ON:AL” indicates active; “--: AL” indicates off).
Press the SET button; when the alarm hour ashes, use the
UP/DOWN buttons to set the correct alarm hour. Press the
SET button; when the alarm minute ashes, use the UP/
DOWN buttons to set the correct alarm minute. Repeat the
above steps for ALARM 2 and ALARM 3.
Sound Control
Press the SET button; the sound control indicator appears
as “--> Sd”, meaning the function is off. Use the UP/DOWN
buttons to turn on sound control. It will display “ON :Sd”
and the clock display light will turn off for about 15 seconds.
INSTRUCTION MANUAL | ALARM CLOCK BOXED LED KA5868
Exit Settings
Press the SET button to exit.
Using the 12/24‑Hour Format
In 12-hour mode, a dot appears at the top left corner of the hour
digit once the time enters PM.
Using the Alarm
When a dot appears at the top right corner of the minute digits,
the alarm is active. If no dot appears, the alarm is inactive. To
stop a ringing alarm, press any button.
Quick Alarm Setting
Press and hold the DOWN button for 3 seconds. When the
display shows “:-- :A1”, press the DOWN button again to toggle
AL1 (display “ON :A1” indicates AL1 is active; “:-- A1” indicates
it is inactive). Then press the SET button to congure AL1 using
the same steps as above. Repeat the same process for ALARM
2 and ALARM 3.
Display Brightness
Press the UP button. When the indicator shows “L1”, use the
UP/DOWN buttons to select between brightness levels L1, L2,
and L3. The display automatically dims from 18:00 to 6:59.
Using the Sound Control Display
Press the DOWN button. When the indicator shows “--: Sd”, the
sound control display is off; when it shows “on:Sd”, it is on.
Display Mode Selection (DP‑1/DP‑2)
Press the SET button to choose the display mode. DP-1 cycles
through time, month/date, and indoor temperature, while DP-2
always displays time.
Temperature Unit Change
Press the UP button to switch between °C and °F if necessary.
Warning
Do not use the product near ammable objects or heat sources.
Do not use the product in high-temperature or high-humidity
environments (e.g., bathrooms); it is not waterproof. Do not
disassemble or modify the product. Handle the product with
care; it may break if dropped.
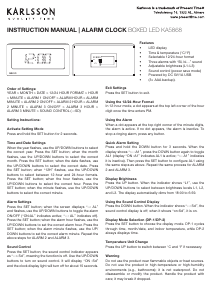
SET
RESET
UP
DOWN
Features
•
LED display
•
Time & temperatur
e (°C/°F)
•
Selectable 12/24
-hour format
•
Thr
ee alarms with “Bi, bi…” sound
•
Adjustable brightness (L1–L3)
•
Sound contr
ol (power save mode)
•
Power
ed by DC 5V/1A USB
•
(3× AAA backup).


Deltag i samtalen om dette produkt
Her kan du dele, hvad du synes om Karlsson KA5868GR Vækkeur. Hvis du har et spørgsmål, skal du først læse brugsanvisningen omhyggeligt. Anmodning om en brugsanvisning kan ske ved at bruge vores kontaktformular.