
EN
DK
CZ
DE
ET
FI
FR
HR
HU
IT
LT
LV
NO
PL
RO
SK
SL
CS
SE
TR
UK
EN
DK
CZ
DE
ET
FI
FR
HR
HU
IT
LT
LV
NO
PL
RO
SK
SL
CS
SE
TR
UK
1. Clean the filter insert and the glass jug after every
use with mild detergent and warm water or in the
dishwasher.
2. If necessary, wipe down the coffee bean compartment
(2) and the lid (1) with a damp cloth.
3. Wipe down the housing with a damp cloth. If necessary,
use a little mild detergent to remove more intense soiling.
Cleaning the Grinder Shaft
1. Remove the coffee beans from the coffee bean
compartment (2). (Apart from the few beans that you
cannot reach by hand.)
2. Insert a paper filter into the filter insert.
3. Press the button (18) to switch on the device.
The grinding process will start.
4. Once the rest of the coffee beans have been
ground - you can tell this from the change in the
grinding noise – stop the grinding process by pressing
the button (26) again.
5. Take out the coffee bean compartment: To do this, turn
it a little anticlockwise until it disengages. Lift it off.
6. Move the grinding fineness dial (8) to the OPEN
position.
7. Pull out the top part of the grinder (3) by the small
handle.
8. Clean the grinder shaft and the grinder with the
cleaning brush that is supplied.
9. Reinsert the top part of the grinder and press it down.
Make sure it is in the correct position (arrow marking).
Fold the handle down again.
10. Adjust the grinding fineness dial back to a grinding
fineness. The grinder is locked again.
11. Place on the coffee bean compartment at an angle and
turn it clockwise a little until it engages.
12. Open the filter compartment (5) to remove the paper
filter.
13. To clean the grinder shaft from below: Press the
button (19) until the symbol occurs. Press the button
(18). The coffee powder tunnel gate will open. Open the
filter compartment, use the brush to clean the residue
inside, close the filter compartment, press the button (26)
to close the coffee powder tunnel gate.
Descaling
As a precaution we recommend descaling after 60 uses.
Use only environmentally friendly descaling agent and
always follow the manufacturer´s instructions.
Fill the water tank with water and descaling agent. Place
the jug with lid on the warming place. Wait 15 minutes
then press descaling button and press START to
start the appliance. Let the water run through. Perform
two more brewing cycles with water only to allow
appliance to rinse through properly.
If the brewing process is to be aborted prematurely,
press the button (26). The operating lamp goes out and
the device will abort the brewing process.
Making Coffee with Coffee Powder
1. Fill the water tank.
2. Open the filter compartment and insert a paper filter.
Add the quantity of coffee powder you want. Close the
filter compartment.
3. Set the desired number of cups with the button .
4. Press the button. The symbol (14) appears on
the display.
5. Press the button (18) to start the brewing process.
If the brewing process is to be aborted prematurely,
press the button (26). The operating lamp goes out and
the device will abort the brewing process.
Making coffee with a pre-set time
To make coffee with a pre-set time, the clock needs to be
set (see “Setting the time”).
1. Make preparations according to your preference, coffee
beans or coffee powder. Pour in water and insert a filter.
2. Set the desired number of cups with the button .
3. For making coffee with coffee powder, press the
button before the timer is set.
The symbol (14) appears on the display.
4. Press the timer button until the indicator time (16)
flashes on the display.
5. Use the and buttons to set the start time you want.
For making coffee with coffee beans, use the button (24) to
set the coffee strength you want.
6. To activate the pre-set time, press the start button
again. The symbol (15) appears on the display.
The pre-set time is activated.
Once the pre-set time is reached, the device switches on
automatically. The operating lamp lights up and the (17)
symbol flashes on the display.
Deactivating the pre-set time
To deactivate the pre-set time setting, press the
CANCEL button (26). The symbol (15) goes out and the
programming is deactivated. However, the pre-set time is
retained and can be reactivated at any time until a new
pre-set time is programmed or the device has been
disconnected from the power supply.
Cleaning and Care
Do not use any toxic, corrosive or abrasive cleaning
agents or scouring sponges to clean the device.
These can damage the surface.
Setting the Number of Cups
Keep pressing the button until the display (7) shows the
number of cups you want (12).
The selected number of cups is saved until a new number
of cups is set or the device has been disconnected from
the power supply. All of the water in the water tank is
always used up, regardless of the set number of cups or
coffee strength.
Setting the Coffee Strength
The coffee strength can be set when making coffee with
coffee beans. To do this, keep pressing the button (24)
until the coffee strength (13) you want is shown on the
display.
- Mild coffee
- Medium coffee
- Strong coffee
The selected coffee strength is saved until a new coffee
strength is set or the device has been disconnected
from the power supply.
Keep-Warm Function
The device has an automatic keep-warm function. The
hotplate remains switched on for 40 minutes after each
brewing process. After the brewing process the keep
warm icon (17a) in the display will be lit. To end the
keep-warm function prematurely, press the button (26)
to cancel.
Drip Stop
The device has a drip stop which prevents coffee from
dripping out of the filter when the jug has been removed
from the device. When the device is in operation, the filter
compartment (5) must be closed and the jug with lid
placed must be placed beneath the filter compartment.
During the brewing process, the jug must not be removed
from the device for longer than 30 seconds as otherwise
the filter could overflow.
Preparation
Making coffee with coffee beans
1. Fill the water tank.
2. Fill the coffee bean compartment.
3. Set the grinding fineness you want.
4. Open the filter compartment and insert a paper filter.
Close the filter compartment.
5. Set the desired number of cups by pressing .
6. Set the desired coffee strength with the button .
7. Press the button (18) to switch on the grinder and start
the brewing process.
6
1
2
8
3
4
7
9
10
11
5
19
20
21
22 23 24
26
25
16
15
13
12
17
17b
17a
14
18
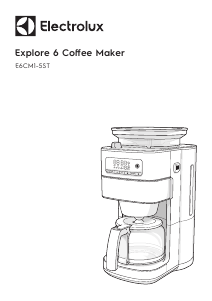
Components
1. Lid for the coffee bean compartment
2
. Coffee bean compartment
3.
Grinder (top part removable)
4.
Control panel
5.
Filter compartment
5a.
Filter insert
6.
Glass jug with lid
7.
Display
8.
Grinding fineness dial
9.
Water tank lid
10.
Fill-level indicator
11.
Water tank
12.
Indicator number of cups
13.
Indicator coffee strength
14.
Indicator coffee powder
15.
Indicator timer
16.
Indicator time
17.
Indicator operation (flashing)
17a. Indicator keep warm-function
18.
start button with operating lamp
19. Descaling/cleaning of shaft
20. Setting pre-set time
21.
Setting the hours
22.
Setting the minutes
23.
Setting the number of cups
24.
Setting coffee strength
25.
Making coffee with coffee powder
26.
Cancel button
Getting started
Wipe the device with a clean, damp cloth. Rinse the glass
jug (6) and the filter insert (5a) with a little mild
detergent and water.
Prior to preparing coffee for the first time, perform one
brew with water only. Fill the freshwater tank up to the
top cup marking with cold water. Close the lid. Press
to start the appliance. Allow the water to flow through
into the coffee jug. When brewing is finished, empty the
coffee jug.
Handling and Operation
Setting the time
As soon as the appliance is plugged into a socket, the
display lighting turns on and the time display
12:00 flashes. The clock has a 24-hour time format.
Set the hours by long pressing;
For both hours & minutes.
1. Keep the button pressed to set the hours (21).
2. Keep the button pressed to set the minutes (22).
The time is saved until a new time is set or the device has
been disconnected from the power supply.
Filling the water tank
1. Open the water tank lid (9).
2. Pour the quantity of water required for the
number of cups you want (maximum 10 cups) into the
water tank (11).
3. Close the water tank lid.
Adding coffee beans
1. Take off the lid of the coffee bean compartment (1).
Ensure that the water tank is closed so that no coffee
beans can fall into the water tank.
2. Fill the coffee bean compartment (2) with coffee beans.
Do not overfill.
3. Place the lid back on the coffee bean compartment.
Setting the Grinding Fineness
Move the dial for the grinding fineness (8) to the position
you want fine/medium/coarse.
When you switch to another grinding strength, there will
still be coffee powder with the previous grinding strength
in the grinder shaft. The grinder shaft may need to be
cleaned beforehand. (see chapter Cleaning the Grinder
Shaft)
Inserting the Filter
1. Open the filter compartment (5).
2. Insert a paper filter into the filter compartment (5a).
Close the filter compartment. It must engage.
5a



Deltag i samtalen om dette produkt
Her kan du dele, hvad du synes om Electrolux E6CM1-5ST Explore 6 Kaffemaskine. Hvis du har et spørgsmål, skal du først læse brugsanvisningen omhyggeligt. Anmodning om en brugsanvisning kan ske ved at bruge vores kontaktformular.